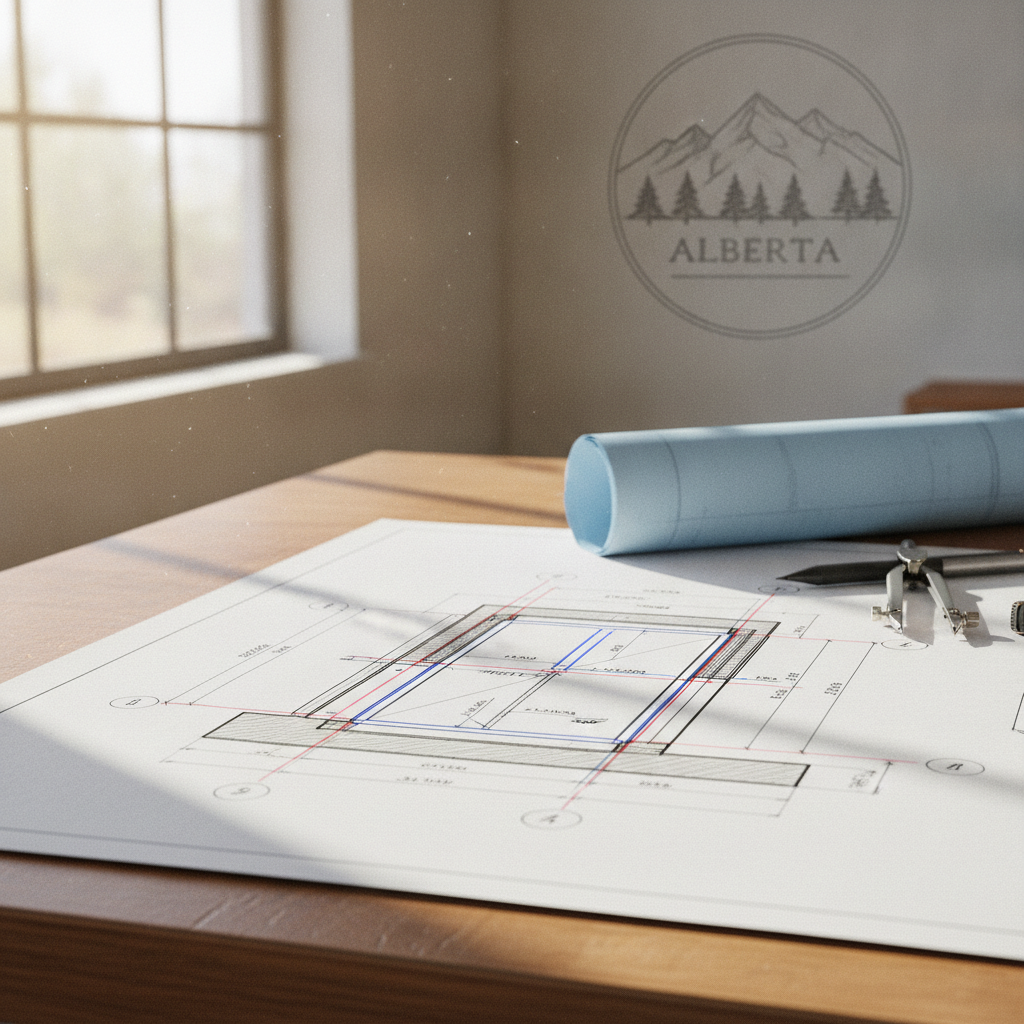
Rough opening framing for windows and doors in Alberta wood-framed homes is the structural foundation upon which weatherproof, code-compliant, and energy-efficient enclosures are built. Meeting the detailed provisions of the National Building Code - 2023 Alberta Edition (NBC(AE) 2023), these framed apertures must not only accommodate intended architectural elements but also transfer loads, manage air and moisture intrusion, and enable fine-tuned installation tolerances for long-term performance and ease of use. Drafters, builders, and developers alike confront challenges unique to Alberta’s construction standards and environmental realities-cold temperature cycles, prairie wind loads, and evolving product expectancies-all magnifying the importance of precision and informed practice in rough opening design and execution.
Understanding the Rough Opening: The Hidden Engineering
The rough opening (RO) is the concealed structural box within which every window and door performs, yet it shoulders far more than the mere physical placement of units. Its dimensions, layout, and framed supports are calculated specifically to provide:
- Adjustability - Allowing for shimming, trueing, and insulation between the window or door frame and rough carpentry.
- Load Transfer - Safely moving roof, floor, and point loads around openings to maintain wall strength and building stability.
- Weather Isolation - Creating clear space for flashings, air barriers, and sealants critical in Alberta’s severe climate.
- Installation Precision - Providing square, plumb, and level geometry so hardware operates and seals perfectly, even after decades of use and exposure.
Too tight, and there’s no room for adjustment, resulting in binding, leaks, or cracked glazing. Too loose, and insulation and air sealing become more difficult, impacting efficiency and comfort. Rough openings are both engineering calculation and practical craft, shaped by code, product specification, and real-world experience on Alberta job sites.
Framing Components: Anatomy of a Rough Opening
Every opening in a wood-framed wall-whether a compact basement window or a grand entry door-relies on a modular assembly of framing members. Each serves a precise structural and installation purpose. The following breakdown explores these elements as required by NBC(AE) 2023 and fortified by field-proven Alberta precedent:
Headers: Engineering the Load Path
The header above each opening is the heart of the structure. In Alberta, snow loads, high wind events, and two-storey construction commonly push headers to their design limits. NBC(AE) 2023 specifies increasingly robust headers as spans (opening widths) grow, and as roof/floor loads and building height increase.
- Non-Load-Bearing Walls: Openings up to 8 feet wide may use a single flat 2×4 as a header if there is no structural load from above and the opening is not more than 24 inches from the nearest nailing surface above. This condition is most common in partition walls or interior doors where only drywall is supported above.
- Load-Bearing Walls: For exterior walls, or interior walls supporting joists, floors, or roof framing, header design is critical. The wider the opening, the deeper and stronger the header required. For small windows, a pair of 2×6s might suffice. Large patio doors or picture windows can require built-up headers-stacked pairs or triplets of 2×10s, 2×12s, or engineer-specified laminated veneer lumber (LVL) to transfer loads while minimizing deflection.
The size and configuration of headers directly depend on:
- The width of the rough opening (clear span)
- Building height and storey count above the opening
- Crippling snow and wind loads-especially on north and west exposures in Alberta
- Spacing of framing supports (jack studs and king studs)
- Type and strength of framing lumber or engineered wood product used
Calculation examples, typically performed during drafting and plan review, apply load tables or engineering formulas to verify member adequacy per NBC(AE) Table 9.23.4.2. Header ends must fully bear on jack studs (trimmers), not just nailed to king studs, to drive loads harmlessly to the bottom plate and foundation. This design detail, often illustrated in Kingsway Drafting’s plan sections, is easily overlooked on-site, potentially causing premature wall deflection or hairline drywall cracks.
King Studs: Framing the Vertical Envelope
King studs are the tall, continuous members running from the bottom plate to the top plate, bounding each side of the opening. They define the width of the rough opening and anchor the assembly within the wall. Sizing and spacing follow typical wall stud standards (commonly 2×4 or 2×6 at 16" or 24" centres), but precise layout during drafting ensures these studs remain full height and uninterrupted-critical when openings are closely spaced or align near corners and wall intersections.
In high wind or tall wall cases, additional king studs may be detailed-especially for oversized windows, multi-panel patio doors, or load accumulations from complex roof lines. Code and best practice align: solid king studs resist bowing, warping, or twisting that would otherwise compromise the squareness and performance of the window/door installation.
Jack Studs (Trimmers): Bearing the Header’s Burden
Jack studs, or trimmer studs, flank each side of the opening, directly supporting the header ends and transferring concentrated loads to the bottom plate. The number of jacks per side increases with opening width and design loading:
- Single Jack - Suitable for small to mid-width windows in typical one-storey construction.
- Double or Triple Jacks - Used for wide openings or situations where significant floors/roof loads concentrate above, or where engineered floor/roof trusses exist.
The drafter specifies jack sizes and quantities during the plan phase, accounting for manufacturer installation requirements and the local inspector’s preferences-especially important in Alberta’s larger custom homes. Omission or mis-sizing of jacks can lead to header sag, cracked drywall, or in extreme cases, problematic settlement of the wall section above the opening.
Sill Plate and Cripple Studs: Completing the Box
Windows require a horizontal sill plate spanning between jack studs at the base of the rough opening. Sills support both the immediate weight of the window unit and provide a continuous substrate for air barrier and insulation installation. Underneath the sill, cripple studs (short, cut-off structural members) restore the wall's full stud spacing below the opening-carrying vertical loads and ensuring the complete wall plane remains stiff, nail-able, and true. Above larger headers, cripple studs are sometimes installed between header and top plate to maintain nailing support for sheathing and drywall, depending on wall height and code requirements.
In Alberta renovation scenarios where old windows are replaced with taller or wider ones, careful removal and replacement of sills and cripples is critical; improperly executed, the wall can lose shear strength and make exterior finishing more challenging.
Calculating Rough Opening Dimensions: Precision Makes Perfect
Every window and door product comes with its own manufacturer-specified "unit size" and recommended “rough opening.” Yet, field variation, seasonal expansion/contraction, and wall system composition (2×4, 2×6, ICF, or SIP) demand a flexible, code-informed approach.
- Windows: Industry standard advises the rough opening should be 1/2 inch to 3/4 inch wider and taller than the exterior window frame. This gap is filled with shims and low-expansion foam, then covered by trim and wall finishes. For instance, a window with a nominal frame size of 48” wide by 36” tall would require a rough opening of 48-1/2" to 48-3/4" by 36-1/2" to 36-3/4". This allowance is sufficient for most wood-framed walls in Alberta but may need adjustment in high-tolerance architectural applications or when factory-mulled window combinations are used.
- Doors: For single, pre-hung exterior and interior doors, the code-conventional rough opening is 2” greater in width and 2 to 2.5” taller than the nominal door slab. Thus, a 36” × 80” exterior door requires a framing aperture of 38” by 82.5”, accommodating the jamb, sill, pre-installed weatherstripping, and sufficient shim space. Double doors, arch-top units, or those with sidelight/transom combinations follow manufacturer guidelines closely and may require specialist rough opening details drafted into the permit plans.
Drafting professionals document all rough opening dimensions on architectural plans, elevations, and window/door schedules. Clear textual callouts and cut-section details greatly reduce field confusion, especially when product substitutions or site modifications arise. This upfront clarity is essential-windows and doors are frequently ordered or manufactured months before installation, and errors in rough opening can delay entire construction projects or result in costly on-site rework.
Common Pitfalls in Rough Opening Sizing
- Ordering window/door units to the rough opening size, not the frame size, leading to installation impossibility.
- Ignoring wall build-up thickness (e.g., extra insulation layers, rainscreen details) that can encroach on the unit and complicate trim or flashing installation.
- Underestimating space needed for effective low-expansion foam insulation or air barrier integration, especially in energy code-driven new builds.
Field-Tested Installation Best Practices: Level, Plumb, Square - Every Time
A perfectly drafted and framed opening is only as reliable as its execution and post-inspection geometry.
- Level (Sill): The bottom plate or windowsill must be level to within 1/8” across the opening width. Discrepancies here make windows difficult or impossible to open/close correctly and may strain multipoint locking mechanisms and weather seals-a serious concern in Alberta’s wind-prone exposures.
- Plumb (Jambs): Side jambs must be plumb within 1/8” over their full height. Even minor out-of-plumb can twist window frames, misalign sashes, or pull doors out of square-causing drafts, leaks, and early mechanical failure.
- Square: Cross-measure diagonally from corner to corner; measurements should not differ by more than 1/4”. If they do, the opening is not truly rectangular, and a square window or door cannot be installed evenly.
Alberta’s climate-high dry/cold swings, moisture ingress from wind-driven rain or snow, and significant settlement cycles in certain soils-means that even small deviations can worsen over time. Seasoned site supervisors use laser levels and long straightedges on critical window and entry door openings, especially on large custom homes where millwork tolerances are tight, and warranty liability is high.
Flashing and Water Management: Defending Against Alberta’s Elements
Drafted rough openings must inherently accommodate effective moisture management strategies, exceeding base code with field realities in mind. NBC(AE) 2023 and CSA-A440.4-19 prescribe specific flashing, shimming, and protection measures that Alberta construction professionals have refined over decades of real-world storms and freeze/thaw cycles.
Sill Pan Flashing
Every opening below grade, and most above grade, should feature a dedicated sill pan: a pre-formed or site-fabricated waterproof tray sloped outward toward the exterior. It must extend several inches past the side nailing fin and project beyond (or integrate with) the wall’s primary weather-resistant barrier (WRB), such as Tyvek ® or similar. Modern best practice is to create a slight 5 to 10-degree slope in the RO framing beneath the sill using beveled wood or composite shims set before pan installation. This subtle angulation guards against ponding and directs any incidental water away from the framing cavity and toward the exterior drainage plane.
Correct Flashing Sequence
- Pan Flashing First: Always set the waterproof pan or membrane before installing the window or door unit. In case of leakage past the window’s bottom seal, water escapes harmlessly rather than accessing the wall cavity.
- Jamb Flashing Next: Adhesive-backed flashing membranes or pre-formed corner boots are extended up both jack studs, sealing and lapping onto the sill pan and subsequent WRB.
- Head Flashing Last: Rigid drip cap, aluminum Z-flash, or flexible membrane is layered across the top of the window or door, always extending a minimum of 1” past each side and overlapping WRB above. The bottom edge should never be sealed, allowing incidental moisture to escape rather than trapping it above the window frame.
Site challenges abound-framed wall bows, irregular sheathing thickness, and harsh wind uplift make diligent pre-planning and thoughtful material selection paramount. Drafting clear, enlarged flashing details on the plans ensures these assemblies are followed even when weather or schedule demands move quickly. For retrofits, flashing integration can be the single most important defense against chronic hidden rot-the result of decades-old practices now considered inadequate or obsolete.
Air Sealing and Insulation: Building Energy Efficiency from the Opening Outward
Beyond structural integrity, Alberta’s modern residential construction requires robust air sealing and insulation strategies at every framed opening to meet energy code requirements and deliver true comfort in sub-zero winters and hot prairie summers.
- Backer Rod and Sealant: Once the window or door unit is installed and shimmed, a compressible foam backer rod is inserted into the gap between the frame and rough opening perimeter. Over this, high-quality flexible sealant is applied to block external air infiltration, especially on the interior side of the opening.
- Low-Expansion Spray Foam: To insulate the cavity without distorting window or door frame alignment (always use low-pressure, window/door specific spray foam), carefully fill between the rough framing and unit. This provides superior R-value and blocks convective air leakage, a significant source of heat loss or gain. Regular foam must be avoided-it can expand too aggressively, twisting frames and voiding product warranties.
- Thermal Break Detailing: Advanced plans often incorporate flexible airtight membranes or capillary break materials as specified by energy modelers. These deliver measurable improvements in airtightness scores-a critical pass/fail criterion in many Alberta municipalities as of 2024.
Upfront, precise rough opening dimensions, and correct installation space, make these energy upgrades straightforward for installers and avoid difficult, incomplete insulation at corners or between closely spaced multiple windows. Drafted window schedules and wall sections should clearly show these details throughout the permit set to meet both inspector expectation and high-performance home outcomes.
NBC(AE) 2023: Key Provisions Guiding Alberta Practice
Part 9 of NBC(AE) 2023 lays out specific mandatory requirements that must be explicitly referenced or detailed in any architectural drafting intended for Alberta permit or construction. Compliant rough openings and installation details address the following:
-
9.7.6.1. Installation of Windows, Doors, and Skylights: Installations must conform to CAN/CSA-A440.4. This means:
- Shims must be used to prevent frame distortion-reducing risk of binding and improper sealing over the building’s life.
- Frames must be fully supported and protected from water entry from precipitation and ground water, which requires integration of pans, flashings, and WRBs, as detailed in site-specific shop drawings and field-tested best practices.
- Window and door units must be fastened per both code and manufacturer instructions, and never rely solely on nailing fins or cladding for structural stability.
- Clearances must allow for seasonal movement of the wood structure (shrinkage, swelling) and for dimensional tolerances of both wood and manufactured products.
- 9.6.1.2. Material Standards for Glass: All glass in windows and doors must meet or exceed requirements for strength, fire safety, and human impact per referenced CAN/CGSB standards, especially in hazardous locations (within 500mm of floor, near bathtubs/showers, or beside stairs).
Drafting notes and specifications must be explicit. For example, “INSTALL ALL WINDOWS AND EXTERIOR DOORS TO CAN/CSA-A440.4 WITH CODE/PRODUCT-SPECIFIC FLASHING, SHIMMING, AND FASTENING PER MANUFACTURER” clarifies field expectation and protects both builder and designer in the event of disputes or third-party inspections.
Real-World Context: Alberta Scenarios and Practicalities
Translating these standards and best practices into effective rough opening design in Alberta means accounting for:
- Large Openings in Custom Homes: Popular modern designs with expansive glazing, lift-slide, or folding doors require consulation with structural engineers and truss designers early in the drafting process. Headers may leap from standard dimensional lumber to tall-storey engineered LVLs or steel beams. Field experience shows that under-allowing for header depth and shim space in the plan phase can stall entire projects, as replacement headers may not fit without major wall rework.
- High-Performance Envelope Detailing: Many high-performance and net-zero homes utilize double-stud framing, exterior insulation, or rainscreen cavities, each of which must be included in the total opening depth. Incorrectly sizing the RO for these assemblies leads to costly rework and thermal bridging at one of the home’s most vulnerable spots.
- Cold Climate Considerations: In Alberta’s colder zones, even minor air leaks or thermal breaks at window/door rough openings can cause persistent condensation, frost build-up, and rot. Drafters include “over-insulation” details-thermal returns, insulated nailing fins, or tape-based air seal solutions-directly in their RO sections in both new builds and major renovations.
- Renovations and Retrofits: When working within existing walls, dimensioning ROs for slightly oversized replacement units is often preferred to guarantee product availability, modern insulation standards, and easier waterproofing integration. (Old brick-mould windows and doors from past eras seldom conform to modern sizing.)
Alberta building inspectors, insurance adjusters, and warranty authorities routinely examine how well the installer has followed these best practices-especially when leaks or operational complaints are reported. Detailed drafting, including three-dimensional or enlarged section details around windows and entries, provides defensible proof of intent and usually expedites project approval.
Expert Architectural Drafting Techniques: Bringing It All Together
- Clear Annotation: Every window and door location on plans is assigned unique tags referencing both product specifications and rough opening dimensions. Window and door schedules, cross-referenced with elevation views, allow field crews to match framing precisely to intended products.
- Detailed Section and Detail Callouts: Key framed openings-especially nonstandard or wide spans-feature enlarged cross-sections showing header size/composition, jack/king stud configuration, and insulation/flashing integration. Unique Alberta site requirements (exposure, aesthetic, product limitations) are visually documented for contractor and inspector review.
- Site-Specific Adjustments: Drafters incorporate explicit notes for variable wall thickness, unique finishes, and adjustable RO tolerance, such as “+1/4” ALL SIDES FOR STONE VENEER WALLS” or “ROUGH OPENING TO ACCOMMODATE FACTORY-MULLED WINDOW ASSEMBLY; VERIFY WITH SUPPLIER.”
- Coordination With Suppliers: Collaborating directly with window, door, and engineered product suppliers early and throughout the drafting phase eliminates errors in unit/RO sizing and ensures schedule-critical manufactured products fit on first installation.
- Anticipation of Field Modifications: Recognizing that as-built site conditions may deviate from plans, competent drafting includes notes directing framers how to adjust for variations without compromising air barrier, insulation, or structural requirements (for example, “WHERE RO MODIFIED >1” FROM PLAN DIMENSION, CONFIRM HEADER/JACK SIZE WITH STRUCTURAL ENGINEER”).
Case Study: Window Wall in a Two-Storey Alberta Home
Consider a scenario where a two-storey home in Calgary is designed with a full-width window wall in the living area, with an opening width of 14 feet. Given Alberta snow loads and wind exposure, the drafter must:
- Specify an engineered LVL or steel header, sized in collaboration with structural engineering, likely upwards of 14” to 16” deep and at least 3-1/2” thick, running the entire 14' clear span.
- Design the RO with at least two jack studs per side (triple for homes with significant second storey or point loads) to distribute header weight down to a reinforced sill plate and foundation.
- Increase king stud count and double-up wall framing on either side of the opening to resist wind-induced racking.
- Enlarge plan details to show step-by-step integration of air barrier, pan flashing, backer rod/foam/caulking, and fin/tape specifics for this highly visible and vulnerable location.
- Add explicit notes for the field: “VERIFY HEADER, JACK STUD COUNT WITH STRUCTURAL ENGINEER BEFORE FRAMING; FINAL PRODUCT DIMENSIONS TO BE CONFIRMED BY SUPPLIER SITE MEASURE.”
This level of drafting and engineering diligence ensures that construction proceeds without delay, product warranty is protected, and final comfort and durability are achieved-despite Alberta’s challenging climate and modern aesthetic choices.
Conclusion
Drafting code-compliant, robust rough openings for windows and doors in Alberta wood-framed homes is a blend of science, experience, and communication. Adherence to NBC(AE) 2023-not just as legal minimum, but as a springboard to proven field performance-delivers homes that withstand prairie storms, conserve energy, and provide lasting comfort. Detailed header sizing, proper stud configuration, precision in rough opening calculation, comprehensive flashing and air sealing, and crystal-clear documentation all serve as the foundation for successful installations and long-term peace of mind. In the rapidly evolving Alberta residential marketplace, leveraging expert architectural drafting is not just prudent; it is essential.
For design documentation that anticipates every opening, reflects Alberta’s code and climate, and ensures smooth inspection and flawless installation, Kingsway Drafting & Design delivers proven excellence from permit to completion.