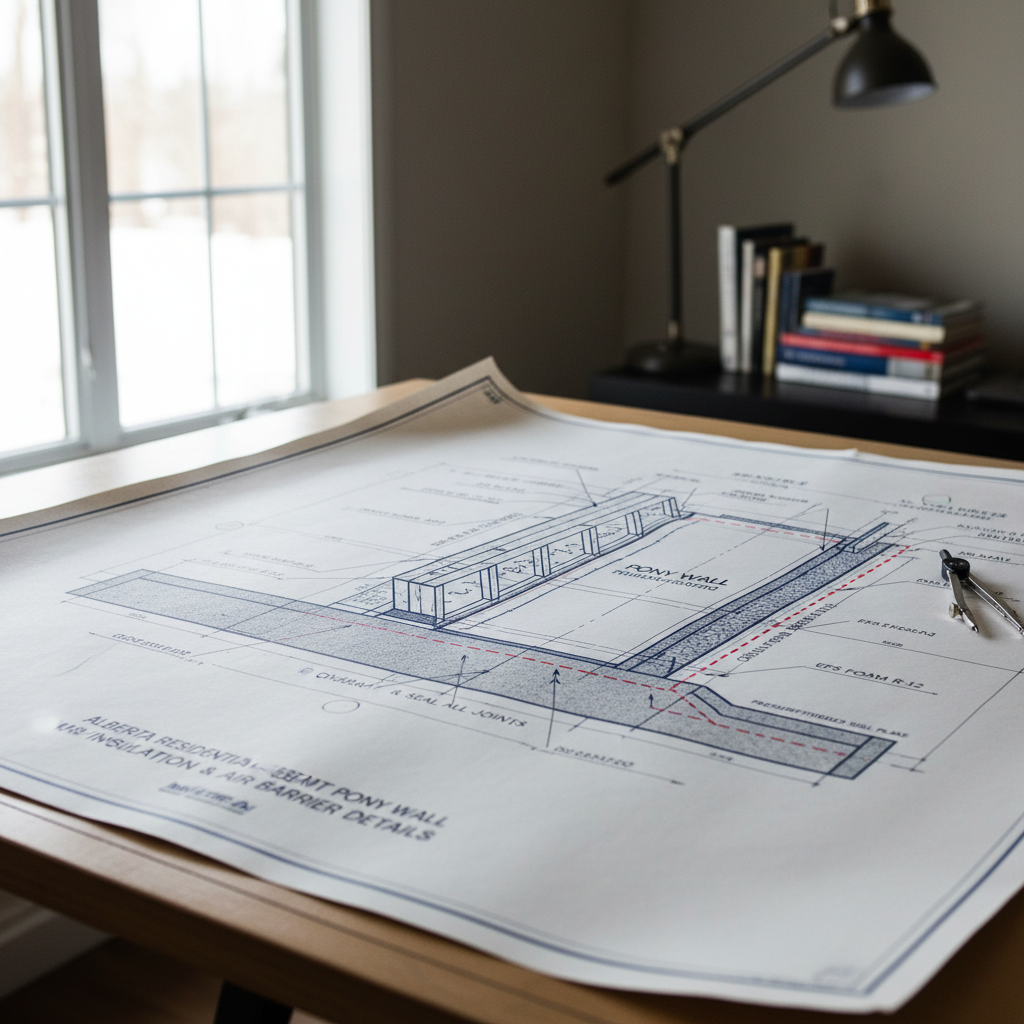
Basement pony walls, often referred to as knee walls, are short wall segments in a basement that fill the vertical gap between the top of a concrete foundation wall and the underside of the main floor framing. These walls are characteristic of walkout basements, homes on sloped lots, or where the grade steps down and the foundation does not extend to the full height of the basement. Their unique position-spanning from concrete to wood framing and often bridging below-grade and above-grade zones-creates specific challenges in insulation continuity, air sealing, moisture control, and thermal bridging mitigation.
Improper detailing in this area often leads to persistent cold spots, condensation issues, musty odors, and even structural deterioration from moisture intrusion. As pony walls must anchor to both the rigid foundation and the flexible main floor, expansion and contraction can stress air or vapour barriers. Any discontinuity risks undermining the entire basement envelope's performance.
Thermal Insulation Standards for Pony Walls (NBC(AE) 2023)
Meeting thermal resistance benchmarks is a foundational requirement for every building enclosure detail. NBC(AE) 2023 sets out two principal R-value (effective thermal resistance) criteria relevant to pony wall construction:
- Above-Grade Wall Segments: Minimum RSI 2.78 (R-15.8)
- Below-Grade Wall Segments: Minimum RSI 1.41 (R-8)
Because pony walls traverse above- and below-grade conditions, the wall assembly must be analyzed segment by segment and in transitions. The code is clear: the effective R-value must be achieved across the full assembly-not just in the insulation layer, but accounting for all components including studs, sheathing, air films, and interior finishes.
The Nuance of “Effective” R-Value
“Effective” R-value refers to the average resistance of the complete wall assembly, including thermal bridges from studs and other discontinuities. For a typical 2x4 stud wall at 16” o.c. filled with fiberglass, actual effective R-value is often lower than the insulation’s nominal rating due to wood’s lower thermal resistance.
For pony wall details, drafters must consider the following practical implications:
- Thermal Bridging: Wood studs interrupt insulation. Using continuous rigid insulation either inside, outside, or between structural elements helps mitigate this effect and reach code-mandated effective R-values.
- Transition Detailing: The junction where the pony wall’s bottom plate meets the concrete foundation is a perpetually cold spot. Here, insulation continuity down to the basement slab or to the exposed face of the foundation is crucial.
- Assembly Detailing: Layering rigid foam over or behind studs, or opting for advanced framing, can improve performance. When space is limited, higher performance insulation types (like spray foam or high-R-value insulations) allow compliance within slimmer profiles.
Uniform Insulation Coverage
Article 9.25.2.3 sets the expectation of complete insulation coverage. Every cavity within the pony wall assembly should be fully filled. Insulation compressions, voids, and misalignments defeat the design intent. Field verification, on-site measurements, and precise cut of insulation materials make the theoretical compliance a reality.
At intersections-such as where the pony wall meets rim joists, beams, or corners-careful “fitting” often demands custom-cutting rigid foam or batts. “Picture framing” insulation around junctions and spraying expanding foam to seal edges are common effective practices on Alberta job sites.
Air Barrier System Requirements for Pony Walls
Controlling air movement is essential for comfort, energy savings, and avoiding moisture-laden air from infiltrating wall assemblies. The NBC(AE) 2023 requirements for air barriers in pony wall zones demand meticulous attention during the drafting and construction stages.
The Code Mandate
Article 9.25.3.1 insists on a continuous air barrier system across all insulated assemblies. For mixed assemblies like basement pony walls:
- The air barrier must run from the foundation wall up the pony wall and tie into the main floor air barrier system.
- All interfaces, corners, and penetrations must maintain airtightness through proper sealing.
Function Under Pressure
The air barrier not only must exist; it must perform despite stack effect, HVAC pressures, and outside wind loads. Air leakage here leads to:
- Condensation on or within wall assemblies, especially in cold weather.
- Reduced energy efficiency as conditioned air escapes or unconditioned air enters.
- Potential mold growth and indoor air quality issues.
Drafting details must anticipate junctions with floor joist spaces, rim boards, and attachment points for framing on concrete. Complex geometry often means the air barrier must “wrap” between materials (wood to concrete, for example), using tapes, membranes, and sealants rated for both bond and flexibility.
Material Choices and Detailing Strategies
Materials with low air permeance (e.g., 6-mil polyethylene, self-adhered membrane, or carefully detailed drywall) are acceptable as air barriers. Drafters must specify material transitions, overlaps, and compatible sealants. For pony walls, both the surface and joint conditions deserve attention:
- Full Face Coverage: The air barrier should face the conditioned space and must be continuous along the entire wall. It cannot be “broken” where the pony wall sits atop foundation concrete. Extending the membrane to lap over both areas is critical.
- Sealing at the Base and Top Plates: A bead of acoustical or polyurethane sealant between the bottom plate and concrete slab/keyed footing, and at the top plate beneath the subfloor, preserves continuity.
- Penetration Detailing: Every wire, pipe, or anchor that crosses through the air barrier must be addressed. “Pre-made” gaskets can be specified for regular penetrations; builder-supplied sealant details for odd-shaped openings.
- Transitions: Where air barriers must shift planes or materials (e.g., from a horizontal ceiling assembly to a vertical wall), explicit overlap and compatible tape/sealant specification ensures effectiveness.
Maintaining the Integrity at Intersections
Detailing is especially challenging where the pony wall meets the rim joist or interfaces with the main floor’s air barrier. Drafters should:
- Draw explicit overlaps-such as 300 mm lap of poly between wall and ceiling.
- Specify tape/sealing at every face change.
- Indicate inspection points on the drawings for builder and inspector review.
Even small 2-3 mm gaps at these critical intersections can drive exponential increases in air leakage, requiring expensive post-construction remediation if not caught early.
Vapour Barrier Implementation
Moisture movement by vapour diffusion is less dramatic than air leakage but significant over time. NBC(AE) 2023, Article 9.25.4.1, mandates a vapour barrier on the warm-in-winter side of all insulated wall assemblies, including pony walls. In Alberta’s cold and dry winter climate, protecting the wall from indoor moisture is vital for durability.
Vapour Barrier Properties and Best Practice
- Material Choice: Most commonly, 6-mil (0.15 mm) polyethylene-matching CAN/CGSB-51.34-M-delivers permeance below 60 ng/(Pa·s·m²), meeting code.
- Smart Vapour Retarders: In special situations, vapour-variable membranes can be considered. These modern materials change their permeance with humidity, helping assemblies “dry out” if wetted.
Designers specifying alternatives should ensure compatibility with code, product listings, and, importantly, with the air barrier if materials overlap in function.
Installation Detailing and Builder Guidance
The installation sequence and continuity for vapour barriers is similar to air barriers but with added emphasis on joint protection:
- Coverage: The vapour barrier sheet should fully cover all insulated faces, extending beyond plywood blocking and around structural projections as needed.
- Sealing: Every joint must overlap at least 100 mm. All laps should be mechanically sealed with code-approved tape or mastic, especially important on cold basement surfaces.
- Protection: Where the vapour barrier is susceptible to future damage (e.g., behind storage shelving or in mechanical rooms), gypsum board or OSB sheathing may be placed in front to guard against punctures or tears.
Material Selection for High-Performance Pony Walls
Choosing the right insulation, air barrier, and vapour barrier materials is as important as specifying correct locations for each. Practical selection impacts constructability, cost, inspection, and long-term durability.
Insulation Materials
- Fiberglass Batts: Cost-effective and familiar, but performance depends on precise fitting and effective air/vapour barrier alignment. Susceptible to moisture absorption if exposed to water leaks.
- Mineral Wool (Rockwool): Higher cost but improved fire resistance and moisture tolerance. Ideal in rim joist or high-condensation risk zones.
- Rigid Foam Boards (XPS, EPS): Provide higher per-inch R-values and low air permeance. Can be installed in continuous layers against concrete or framing, reducing thermal bridging.
- Spray Foam (Closed-Cell Polyurethane): Exceptional for air sealing and insulation combined. High up-front cost, but valuable in complex or irregular pony wall geometries and at junctions with rim joists or beams.
For pony wall applications, many Alberta drafters now favour a hybrid approach: continuous rigid foam over the entire foundation and wall face, with batt or mineral wool between studs, achieving both insulation value and air control.
Air Barrier Materials
- 6-mil Polyethylene: Doubles as both air and vapour barrier when fully sealed, well-suited for standard basement wall assemblies. Most effective when detailed for continuous coverage and sealed transitions.
- Specialized Air Barrier Membranes: Self-adhering or mechanically-fastened membranes with high bond strength; often used for high-performance or Passive House assemblies.
- Sealed Drywall: With caulked joints and gaskets, drywall can function as an air barrier if sequenced and detailed correctly. Less common in basements due to risk of future repair after water exposure.
Vapour Barrier Options
- 6-mil polyethylene is the “standard issue” barrier for most Alberta basement builds.
- Smart retarders, such as CertainTeed MemBrain or other proprietary solutions, are gaining ground in renovation or high-humidity risk zones.
Specifiers must ensure compatibility. For example, if a single material will serve as both air and vapour barrier, it must be robust enough for both jobs. Product manufacturer listings, ICC reports, and site-proven best practices guide final product selection in Alberta’s climate.
Drafting and Installation Details: Bringing Theory to Practice
Even top-tier products fail if not installed correctly. Drafting must convey clear, unambiguous details that builders and trades can follow on site to achieve the performance modeled in the office.
Framing Requirements for Pony Walls
- Structural Attachment: Pony wall framing should be anchored securely to the top of the foundation and to the main floor’s subfloor, resisting lateral movement and settlement.
- Plumb and Level: Framing accuracy directly impacts insulation fitting and the continuity of barrier systems.
- Material Longevity: Use of pressure-treated or rot-resistant lumber at interface areas with the concrete foundation prevents premature deterioration from incidental moisture.
Thermal Bridging Mitigation
Thermal bridging, especially through the bottom or top plates and at rim joists, is a persistent challenge. Effective strategies include:
- Continuous Insulation: Layering rigid foam outside of studs, between the frame and drywall or exterior air barrier.
- Double Wall Construction: For high-performance builds, separate structural and insulation-supporting walls limit direct wood-concrete-wood thermal bridges.
- Spray Foam at Junctions: A 1-2 inch layer of closed-cell foam in corners, rim joists, and plate intersections bridges gaps that are nearly impossible to insulate with rigid or batt products alone.
Sequencing Barriers: A Critical Construction Step
The “order of operations” in the field must be coordinated by drafters on plans and by trades on site. The proper sequencing ensures there are no obstacles to continuous insulation and barrier installation:
- Install any exterior damp-proofing and perimeter drainage at the foundation wall first.
- Frame the pony wall, ensuring solid attachment above and below.
- Fit insulation precisely-batts into studs, rigid foam tight against concrete or wood, spray foam at odd angles.
- Install the air barrier, ensuring full face contact with insulation. Overlap with the exterior wall/ceiling air barrier membranes and seal all joints with high-performance tape or acoustical sealant.
- Install vapour barrier on the inside face, sealing all laps and punctures. Overlap and seal at all transitions, especially at rim joists, electrical boxes, and penetrations.
- Cover vapour and air barriers with protective drywall or sheet goods before occupancy or final inspection.
Making sequencing clear on architectural drawings with “keynotes,” sectional cutaways, and step-by-step assembly details supports both trade execution and inspection compliance.
Detailing Penetrations: Every Opening Counts
The pony wall’s location-often near mechanical runs, plumbing stacks, and electrical wiring-means numerous potential penetration points. Every one is a potential point of failure unless detailed and constructed rigorously.
- Electrical Boxes: Specify poly or foam gaskets behind boxes and instruct electricians to seal every perimeter.
- Plumbing Penetrations: Require oversized vapour barrier boots or pre-formed sealing collars. On-site, instruct plumbers to not “slice” vapour barrier sheets haphazardly but use grommets or boots before final sealing.
- Anchors and Fasteners: Detail the use of foam or flexible sealant around all concrete/wood anchors. Large diameter fasteners or multiple bolts can account for significant air leakage if unsealed.
Reinforcing these points with generalized notes (“All penetrations to be individually sealed with compatible material”) and with keyed details on the drawings communicates their importance to trades and inspectors alike.
Moisture Management Around Basement Pony Walls
Even with perfect insulation and airtightness, water infiltration will undermine any basement assembly. Alberta’s climate, freeze-thaw cycles, and flash events require robust exterior and interior moisture strategies.
- Site Grading: Drainage away from foundations-a minimum slope of 5% (i.e., 6 inches over the first 10 feet)-is recommended around all new foundations.
- Damp-Proofing: Apply code-compliant damp-proofing membrane or coating to the exterior of any below-grade concrete wall surfaces. Detailing should include a minimum 150 mm upturn above finished grade.
- Sill Gaskets: Between wood plates and concrete, both for air sealing and to reduce wicking of moisture from slab to wood framing.
- Interior Vapour Management: Specify dehumidifiers for the construction phase and ensure thermal, air, and vapour barriers are complete before heating/ventilating is engaged.
- Drainage Control: All exterior wall assemblies below grade must tie into perimeter drain systems, and window wells for basement window openings should be clearly shown in drafting to avoid collection at wall bases.
Compliance Verification and Inspection Protocols
Verification is critical to guarantee performance matches the code intent. The following measures serve both as drafting guidance and as checkpoints for builders and municipal inspectors.
- On-Site Inspections: Plan for pre-drywall inspections focusing on insulation fit, air/vapour barrier overlap and sealing, and the continuity of barriers at transitions. Inspection points should be identified on wall sections or detail callouts in drafting packages.
- Documentation: Maintain a clear record of:
- Product data sheets for all specified barriers and insulations.
- Photographs of details at key stages-before barriers are concealed.
- A log of deviations with reasons and corrective actions.
- Performance Testing: Conduct blower door tests after air barrier installation and prior to drywall. This allows for remedial air sealing while access to critical assemblies remains open.
Any test failures or inspection deficiencies should be met with corrective action plans-clearly instructed on drawings and in field reports-to achieve compliance prior to occupancy or municipal sign-off.
Special Considerations for Renovations and Older Basements
Many Alberta pony walls arise in retrofit scenarios or unfinished basements. Renovation details differ from new builds, demanding flexibility in product specification and installation technique:
- Existing Framing: Assess the condition and plumb of framing. Warped or sunk walls should be stabilized before new barriers/insulation are installed.
- Moisture History: If there are signs of prior leakage, water stains, or efflorescence, address the exterior moisture source first. Avoid sealing a “wet system” inside-out with airtight membranes until the exterior is reliable.
- Access: Where full face installation of new air/vapour barrier is not possible, use spray foam or fluid-applied barriers at transitions to bridge discontinuous surfaces.
- Compatibility: Ensure that new coatings, rigid boards, or sealants are compatible with any remnants of old tar, asbestos, or historic construction materials. Manufacturer technical support and third-party engineering reports are invaluable in these “hybrid” assemblies.
Drafting details must anticipate field irregularities and offer practical options-such as multiple permissible sealant choices, or alternate air barrier approaches-so renovation crews can adapt without compromising code compliance.
Optimizing for Energy Efficiency and Future Durability
Modern Alberta building performance standards push beyond minimum code. Incorporating high-performance details in pony wall assemblies pays for itself in reduced heating costs, improved occupant comfort, and resilience against moisture damage or freeze-thaw cycling. The following best practices gleaned from field and office experience:
- Thermal Imaging: After construction, conduct IR thermographic scans during cold weather to check for cold spots indicating insulation voids or air leakage.
- Dual Barrier Redundancy: In sensitive areas, specify both a separate air and vapour barrier; if one is compromised, the other maintains performance. For higher energy labels (Net Zero, Passive House), dual barriers are standard.
- Physical Protection: Finish below-grade walls with cement board or treated sheathing under drywall, protecting against accidental punctures or future renovations.
- Product Upgrades: Consider upgrading to higher R-value foam boards or closed-cell spray foam where the assembly is shallow or thermal bridging is otherwise difficult to mitigate.
- Commissioning and Education: Provide builder and homeowner guides describing the function and maintenance of all barrier systems installed.
This proactive approach not only satisfies NBC(AE) 2023 minimums but extends the lifespan and reliability of the basement envelope. Drafters’ careful attention to these “above-code” tactics is often a difference-maker for long-term client satisfaction.
Conclusion
Drafting compliant, high-performance insulation and air barrier details for basement pony walls in Alberta demands deep familiarity with NBC(AE) 2023, strong coordination of materials, and clarity in construction documentation. By focusing on insulation continuity, robust air and vapour barrier installation, careful penetration detailing, and thorough moisture control, every draftsperson and builder supports safer, warmer, and more energy-efficient homes. Layering best practices above code baseline ensures that basement assemblies will endure Alberta’s demanding climate and provide durable results for occupants and future renovations.
To benefit from precise, code-compliant drafting for all residential and renovation projects in Alberta, Kingsway Drafting & Design delivers architectural documentation tailored to builders’ real-world needs and municipal requirements.