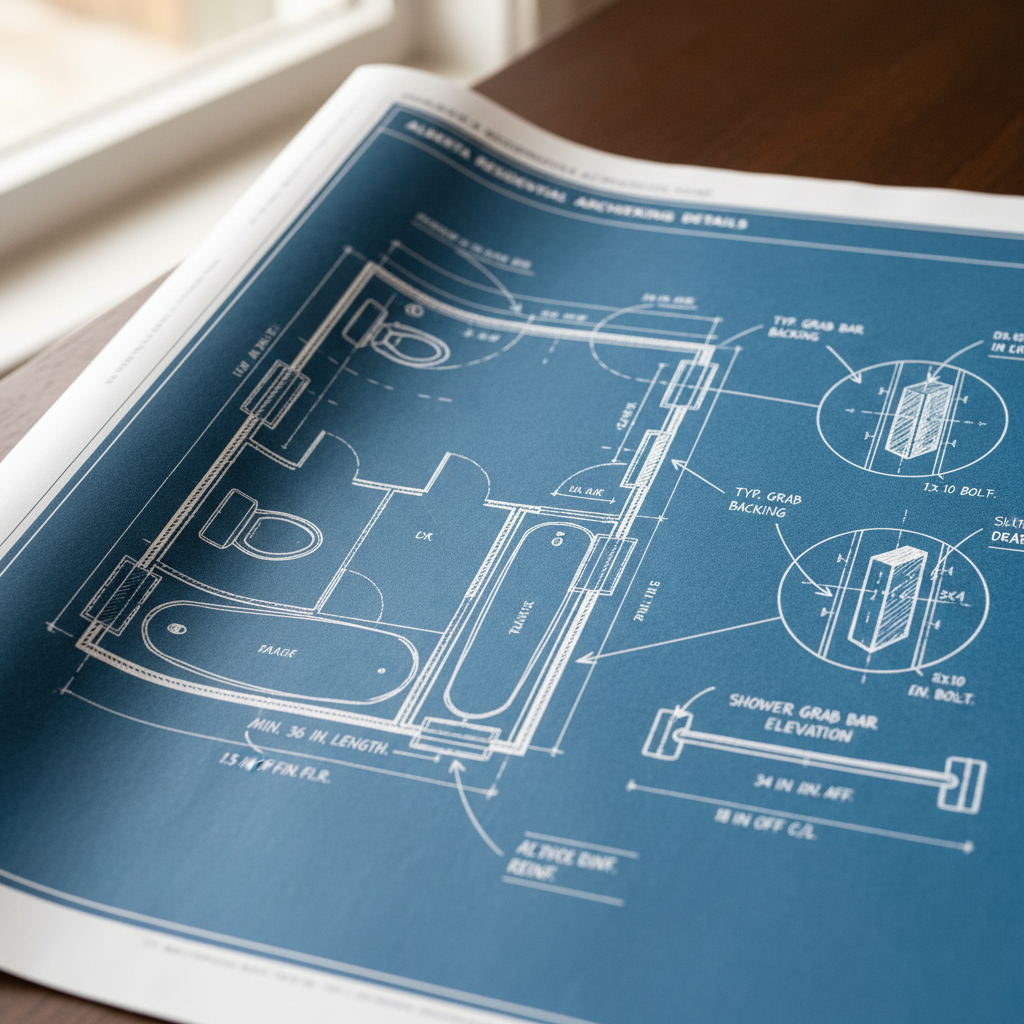
Every year, the need for adaptable bathroom spaces in Alberta homes intensifies as households change, age, and evolve. Anticipating the requirements for grab bars during the drafting stage not only supports present accessibility objectives but ensures long-term value, safety, and usability for all building occupants. The intricacies of how and where to prepare walls for future grab bar installation demand a deep understanding of both code and construction realities.
Grab Bar Code Requirements: The Alberta Context
The NBC 2023 Alberta Edition (NBC(AE)) sets forth detailed specifications for grab bar installations in barrier-free bathrooms. These details, while aimed explicitly at accessible facilities, serve as a gold standard for preparing residential bathrooms-even those not immediately requiring accessible features. Adopting these standards universally ensures that homes can later adapt to the needs of aging-in-place, injury recovery, multigenerational living, or resale to mobility-impaired individuals.
Alberta code requires grab bars meeting precise physical and performance specifications:
- Load Capacity: Able to sustain at least 1.3 kN (292 pounds) exerted in any direction, whether vertically or horizontally.
- Surface and Profile: The bar must be slip-resistant, free of sharp or abrasive elements, with a circular cross section between 30 mm and 40 mm diameter (1.18 to 1.57 inches).
- Clearance: Installed bars must maintain 35 mm to 45 mm (1.38 to 1.77 inches) of open space between the bar and the finished wall, allowing a secure grip and minimizing entrapment risk.
- Location for Water Closets: An L-shaped bar, with both horizontal and vertical legs of at least 760 mm (29.9 inches), must be installed beside toilets, following specific height and projection requirements.
Although not every bathroom in a dwelling is required to be barrier-free under the code, the wisdom-and growing demand-for pre-planning blocking for future grab bar installation is clear.
The Value of Blocking: Enhancing Bathroom Safety and Flexibility
Blocking refers to reinforcing internal wall areas with solid backing-usually lumber, sometimes plywood-so that heavy fixtures like grab bars can later be affixed securely. Without proper blocking, retrofitting a grab bar often means invasive demolition, wall anchoring (with unpredictable results), or, in the worst cases, mounting to drywall alone-substantially compromising the bar’s reliability and user safety. Blocking installed at the time of construction or major renovation is a minor investment with enormous long-term impact.
Key Benefits of Future-Proofed Blocking
- Invisible Preparation: Blocking remains hidden behind drywall, preserving aesthetics while quietly supporting future adaptations.
- Rapid Adaptation: Needing a grab bar due to an unexpected injury or changing occupant needs becomes a matter of hours, not days or weeks.
- Reduced Costs: Upfront blocking saves the cost and disruption of future demolition, repair, and finishing work.
- Maximum Safety: Fastener anchorage into solid wood, rather than uncertainty about wall structure, ensures grab bars function as intended.
Drafting for blocking is more than a technical choice. It’s a commitment to designing homes that grow and flex as people's lives shift. Careful consideration at the design stage carves a path toward genuinely inclusive environments and greatly increases property appeal in the current market.
Blocking Practices Backed by Alberta Building Code and Field Experience
Material Choice and Fastening for Reliable Support
Solid wood blocking remains the most reliable method for facilitating future grab bar installation in Alberta. Preferred dimensions are 2x8 or 2x10 lumber, placed flat (horizontally) between wall studs. Using dimensional lumber provides the strength and thickness to capture grab bar fasteners without risk of splitting, pulling through, or flexing under heavy loads-crucial for meeting NBC(AE) load requirements.
- Attaching Blocking: Fasten the blocking with framing screws (not nails) driven into the side of adjacent studs. For extended spans or at intersecting walls, include blocking at multiple points and use metal framing clips if necessary. The connection must resist both direct pull-out and rotational (torque) forces, reflecting the code’s load application expectations. Scrap lumber or alternative non-structural materials should never be used, as their unpredictable composition undermines reliability.
- Plywood Backing Option: In addition to or in place of dimensional lumber, 19mm (0.75”) plywood sheathing may be added across a wall area. This method offers a continuous mounting surface-particularly advantageous in tiled showers or where maximum positional flexibility is desirable. Screw the plywood securely to all available studs at regular intervals, ensuring flush contact and eliminating voids.
Combining these methods can strongly support diverse grab bar shapes and lengths, especially if future locations are uncertain. In high-end or custom homes, entire walls may receive continuous plywood backing to accommodate non-standard accessibility upgrades later.
Strategic Placement: Heights, Lengths, and Locations for All Fixtures
Blocking must be positioned to align with both standard code-compliant grab bar placements and the real-world ergonomic needs of users. Anticipating all likely future scenarios enables straightforward, on-demand upgrades without costly redos.
- Horizontal Grab Bars: For horizontal bars beside toilets, in tubs, or inside showers, blocking should be centered between 750 mm and 850 mm (29.5 to 33.5”) above the finished floor. This range ensures compliance with code while accommodating slight personal adjustments during installation.
- Vertical Grab Bars: Vertical bar installations require blocking from near the floor (starting at about 450 mm or 18” up to at least 1800 mm or 71”). This extended blocking range supports bars of varying lengths and mounting preferences-especially critical for transfer or support alongside bathtubs and showers.
- L-Shaped Bars (Toilet Area): L-shaped bars require both vertical and horizontal blocking, generally covering a zone that reaches from approximately 150 mm (6”) forward of the toilet bowl toward the wall behind, and from 750 mm to 850 mm (30” to 33.5”) above floor level on the horizontal, with the vertical segment extending up at least 760 mm (30”). Providing both directions ensures any L-shape configuration can be accommodated, regardless of future bar manufacturer or occupant preference.
As the code sets minimum lengths (760 mm or 30” for both bar segments) and specific projections from the fixture, blocking must always extend 100 mm (4”) beyond each end of the likely bar placement. This overlength covers variations in bar size and bracket design, granting flexibility in final installation and compliance with code-mandated fastener spacing.
Blocking for Tubs, Showers, and Combination Units
Unique challenges arise with tub and shower enclosures due to diverse layouts-alcove, corner, open walk-in-and surface treatments that can complicate mounting after the fact (tiled walls, acrylic panels, etc.). Thorough blocking is best practice regardless of the project's baseline accessibility designation.
- Showers: For showers, install blocking on every wall where a person might brace, balance, or move. Code typically requires at least two bars-one along the side wall, another along the rear-but prudent design often includes three-sided blocking. For step-in showers, ensure blocking is set both at code-mandated height (750-850 mm) and higher up (up to 1200 mm or 48”) for angled or diagonal bars, which some users prefer for transfers.
- Bathtubs: Blocking on the back wall (the long wall adjacent to the tub rim) and, depending on enclosure, at least one end wall is standard. Consider common handholds: the area directly above the tub apron and the wall at the plumbing end of the tub (especially if the tub includes shower controls). Vertical blocking must reach up enough to provide support for users as they step into/out of the tub, not just horizontally along the rim line. For soaker or whirlpool tubs with wider decks or surrounds, set blocking to accommodate alternative bar locations and heavier anticipated weights (due to increased risk of slip).
Combination tub-showers must be blocked as for both uses, spanning the entire area above the tub rim and along side walls. Where glass panels or enclosures are anticipated, clarify in the drawings which walls will remain available for grab bar installation.
Toilet Adjacent Blocking: L-Shapes and Bar Versatility
L-shaped grab bars at toilets, as required by code, offer critical support for transfers as well as leverage for standing up and sitting down. Ensuring future installability requires careful attention during framing and documentation:
- Side Wall Blocking: Place framing horizontally at 750-850 mm above finished floor, extending at least 900 mm (36”) alongside the toilet with an additional 100 mm (4”) at each end. For bathrooms where accessibility may be needed either left or right of the fixture, duplicate blocking on both sides.
- Vertical Bar Blocking: Provide a vertical section starting 150 mm (6”) in front of the bowl's front edge and climbing a minimum of 760 mm (30”) high. This accommodates both standard L-shaped bars and possible alternate mounting positions.
- Rear Wall Blocking: For installations where a rear wall bar is planned (in parallel with or in addition to the side bar) install blocking at the same heights, but extending across the entire rear wall behind the toilet. This also supports bidet seats or other assistive hardware if required later.
Documentation should state the dimensions and extents of all horizontal and vertical blocking around plumbing fixtures, referencing fixture rough-ins and clearances to guarantee future compatibility. Accurately placed blocking removes ambiguity for both current construction and for those undertaking later retrofits.
Drafting Documentation and Communication for Long-Term Usability
Merely installing blocking isn’t enough-a robust design requires explicit documentation and transparent communication among all stakeholders. Drafting professionals must annotate plans clearly, reference elevations, and maintain as-built records so the location of every backing piece is known long after walls are closed.
Best Practice Documentation Techniques
- Construction Drawings: Use keyed symbols and notations to explicitly mark the areas of installed blocking. Provide enlarged details for every water closet, shower, or bathtub area where blocking is provided, indicating exact heights (from finished floor, not structure), runs, and material (specifying 2x8, 2x10, 19mm plywood, etc.).
- Schedules and Notes: Draft a blocking schedule as part of construction documents, denoting all rooms and walls with blocking, and cross-referencing to drawing elevations. Describe the purpose of blocking (e.g., “future accessible grab bar”, “shower seat support”).
- As-Built Photographic Records: Collect photographs of each area after blocking and before drywall is installed. Label the photos and append them to project records, giving future renovators a clear reference. QR codes or digital files can be attached to electronic sets or homeowner manuals for easy future retrieval.
- Wall Tagging for Owners: Discreet tags, stickers, or notations placed on the subflooring behind baseboards, or within electrical boxes, can alert homeowners or renovators to the presence, height, and extent of hidden backing in years to come.
Clear, thorough documentation protects both the homeowner’s investment and the builder’s liability, preventing confusion, misplacement of grab bars, or the wasted expense of intrusive exploratory demolition.
Coordination with Other Trades: Ensuring Precise Execution
Blocking for future grab bar installation must not occur in a vacuum. Cross-trade coordination is vital to ensure that framing, plumbing, wiring, venting, and mechanical systems can coexist without conflict.
Common Site Coordination Issues
- Plumbing Conflicts: Drain and vent stacks, supply pipes for showers or toilets, and wall-mounted plumbing fixtures frequently compete for the same stud bays where blocking should be installed. Early consultation of rough-in diagrams, and, if possible, pre-built blocking with notched or drilled channels, can resolve such conflicts before walls are closed.
- Electrical Interference: Light switches, outlets, heated flooring controls, or radiant panels may share the same zones as blocking. Dimensionally plan all wall penetrations and switch heights so they do not compromise the intended run of backing. Consider a hierarchy: safety-critical blocking takes precedence-and requires electrical devices to shift up or down where possible.
- HVAC and Ventilation: Bath fan ductwork, wall registers, or in-floor heat manifolds must also be considered. Review mechanical drawings in tandem with architectural blocking plans, and conduct a site walk with all major trades before framing inspection to verify “no conflict” zones.
In larger or multi-unit developments, formal coordination meetings and marked-up plan sets are essential. On infill or custom projects, builder communication and on-site whiteboard notes (or erasable wall markings) serve the same purpose. Early and frequent coordination speeds construction while preserving the value of invested time in precise architectural drafting.
Advanced Blocking Techniques: Beyond Code, Toward True Adaptability
Plywood Backing for Maximum Flexibility
While code only necessitates localized blocking, forward-looking projects often employ continuous plywood backing to create a fully adaptable “safe zone” anywhere along a given wall. A minimum 19 mm (0.75”) thick plywood, secured to every stud at 400 mm (16”) intervals, spans from the floor up to a height of 1200-1800 mm (48-71”). This method is especially effective in showers-especially tiled surrounds-where later access and modification are significantly more difficult and costly.
- Advantages: Unlimited placement options for grab bars, shower seats, towel bars, or other heavy fixtures. Also supports heavy mirrors or other wall-mounted devices.
- Material Quality: Use exterior grade plywood (for bathrooms with high humidity or likely water exposure), which resists long-term delamination or rot should moisture intrusion occur.
In bathrooms intended for aging-in-place or part of accessible suites in multi-unit developments, plywood zones are strongly recommended for both convenience and risk-liability mitigation.
Inspections, Verification, and Record Keeping
Before drywall installation, all blocking should be inspected for correct placement, fastening, and material. Verification can be performed by the framing contractor, a site supervisor, or the designer. Take clear digital photographs, documenting at least one image per wall section with visible measuring tape and orientation labeling. These are best archived with the digital project file and included in the final “as-built” package delivered to owners or future contractors.
- Critical Points for Inspection:
- Is the blocking centered at the required code heights?
- Does it span the anticipated bar’s length plus 100 mm (4”) at each end?
- Is every fastener tight, with no visible splits or weak connections?
- For plywood backing, is the panel solidly flat to the wall and fully supported at both edges?
No blocking should be buried without visual confirmation and record. This not only ensures code compliance but demonstrates due diligence in risk mitigation and future-proofing homeowner investments.
Practical Construction Sequencing
Blocking is typically installed after top-out of plumbing and electrical, but before wall insulation or sound attenuation batts. On high-performance homes requiring rigorous vapor barrier integrity, it may be necessary to pre-cut or caulk around blocking to prevent air leakage or dew-point issues at exterior bathroom walls.
- Sequencing Tip: Experienced architectural drafters detail the blocking layout and issue the drawings or work orders before ordering rough openings for walls. This forethought minimizes jobsite confusion and rework at the framing stage.
Cost Implications and Design Value
The additional cost for proactive blocking is marginal-typically a few lengths of lumber or a half-sheet of plywood per bathroom, plus modest labor time (fastening, marking, verifying, and photographing). The risk reduction, market appeal, and future renovation savings far outweigh this minor expense.
From a design and sales perspective, being able to document and advertise “grab bar ready” bathrooms is a clear differentiator as Alberta’s population ages and as inclusive design becomes a mainstream expectation. For developers and builders, this is a value-added selling point; for owners, it is home insurance against both accident and obsolescence.
Real World Challenges and Solutions: Alberta Examples
Several Alberta-based projects have demonstrated the long-term benefits of thoughtful blocking at the drafting and framing stage:
- Calgary Custom Home (2018): A multi-generational family requested bathrooms prepared for both current parents and future aging relatives. Blocking was installed for all toilet, tub, and shower walls-even powder rooms. No accessible fixtures were initially required, but in 2023, following an accident, the downstairs shower was upgraded with grab bars, completed in a single afternoon without opening up a single wall, saving two days’ labor and thousands in repairs.
- Edmonton Infill (2020): Builder provided a continuous plywood “accessibility band” in every bathroom from 750 mm to 1200 mm above finished floor on at least two walls per room. This feature was included in promotional material and allowed buyers to “future-proof” their investments. Show homes featured tagged locations with photo documentation, and the code-compliant design was favorably noted in municipal inspection reports.
- Rental Renovation (Red Deer, 2022): Lacking existing blocking, a grab bar retrofit required demolition of tile and waterproofing, costing $4,500 and displacing tenants for a week. Owners subsequently requested all vacant units be retrofitted with blocking during turnovers, aligning with current best practice recommendations from their architectural drafter.
These lived experiences show that the up-front diligence at the drafting table has direct, measurable benefits in time, budget, client satisfaction, and future safety.
Emerging Trends and Foresight in Accessibility Preparation
Universal Design and Aging-In-Place
Alberta’s demographic trends strongly favor universal design-homes planned for all users, regardless of age or ability. Provincial health agencies, insurers, and accessibility consultants increasingly recommend (and in some public projects, require) blocking in every new bathroom, aligning with the philosophy that “inclusive by default” reduces cost and disruption later on. Specification of blocking in every bathroom, not just barrier-free labeled units, is increasingly standard in subdivision design, multi-family developments, and custom builds for forward-thinking owners.
Boilerplate Specification Language for Construction Documents
Professional architectural drafters are now including blocking notes as a standard part of bathroom construction details:
- “Provide solid 38x140 mm (2x6) or larger wood blocking at all locations designated for future grab bars, including a minimum horizontal run at 800 mm AFF and a minimum vertical run 150 mm forward of toilet bowl, to heights indicated. See plan for extents. Secure with framing screws at each stud. Record location for owner records prior to closing wall cavity.”
Builders, renovators, and inspectors recognize these notes as signaling high-quality, code-responsive, and market-aware design work.
Technology Aids for Future Identification
New technology, such as RFID tags or magnetic stud locators, can be embedded within blocking zones to help future contractors quickly pinpoint support locations behind finished walls without guesswork or wall-penetrating scans. Tags linked to digital blueprint files further reinforce the long-term accessibility strategy.
Frequently Overlooked Details in Drafting and Construction
Surface Finish Compatibility
Tile, stone, or acrylic bathtub/shower surrounds require special consideration-unblocked areas can crack or shatter if grab bars are installed later without adequate backing. The cost of reinforcing after the fact is significant compared to in-place blocking, yet often missed in base-level residential drafting.
Shifting Fixture Locations During Construction
Toilets, tubs, and showers can sometimes shift slightly during framing or rough-in adjustments. Drafters should specify blocking in terms of “distance from nearest finished wall” and cross-reference fixture rough-in locations, adding tolerance zones to catch minor onsite deviations. Builders should be informed that moving fixtures must also prompt adjustment to blocking before drywall.
Takeaways and Recommendations for Drafting Excellence
- Always plan and document for grab bar blocking during design, not as an afterthought.
- Specify code-compliant heights, extents, and reliable materials (2x8/2x10 lumber or 19 mm plywood).
- Insist on cross-discipline communication among framing, plumbing, electrical, and HVAC trades before final wall closure.
- Employ clear plan notes, schedules, as-built photographs, and homeowner documentation to ensure long-term clarity and value.
- Consider continuous plywood for maximum adaptability, especially in showers and larger bathrooms.
Proactive drafting for grab bar blocking is an investment in both current code compliance and future occupant support, reflecting a craftsman’s approach to architectural preparation and a deep understanding of building lifecycle realities.
For experienced drafting professionals in Alberta-especially those serving the growing multigenerational, accessibility, and custom-home markets-embedding robust blocking details into every bathroom design is now not just best practice, but an industry hallmark of quality and foresight.
Thoughtful architectural drafting, paired with clear communication, protects future safety, support, and value-principles at the heart of Kingsway Drafting & Design’s design philosophy.